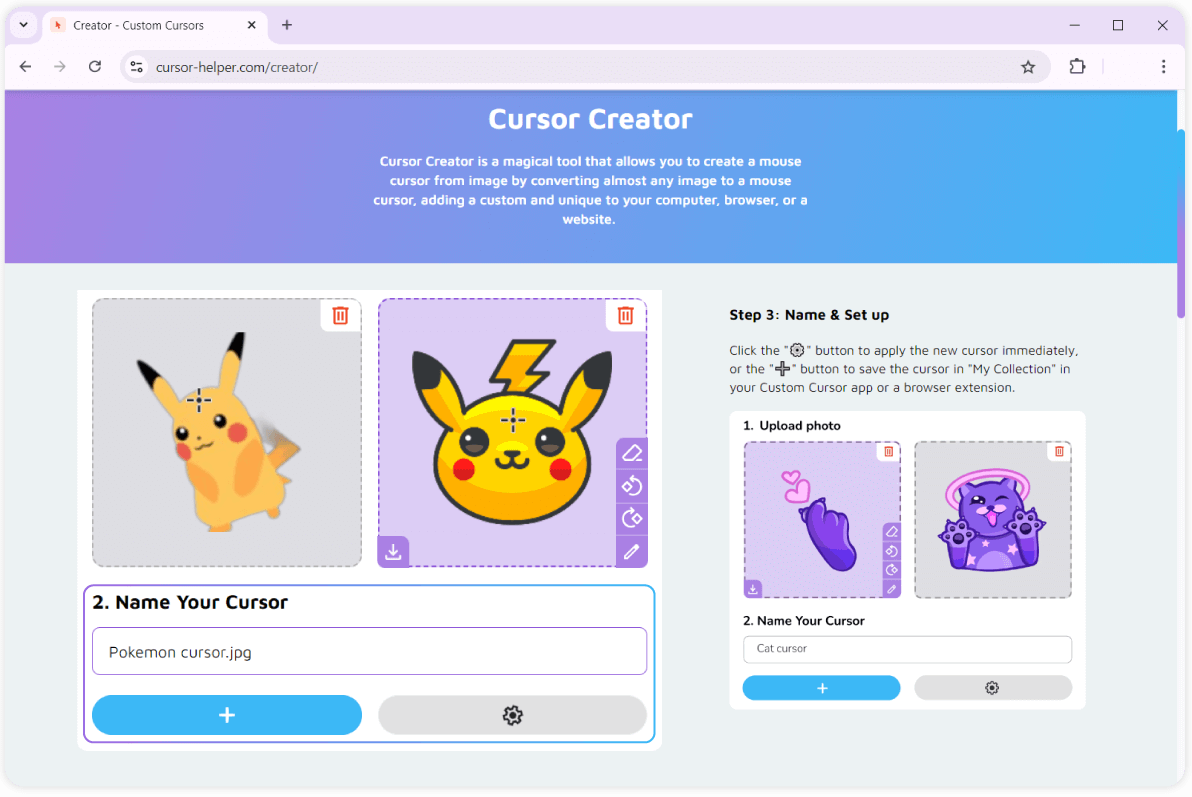
- How to use Cursor Helper Creator tool?
Cursor Creator — guide
Step-by-step guide on how to use the Cursor Helper Creator Tool to design and customize your unique cursors.
1
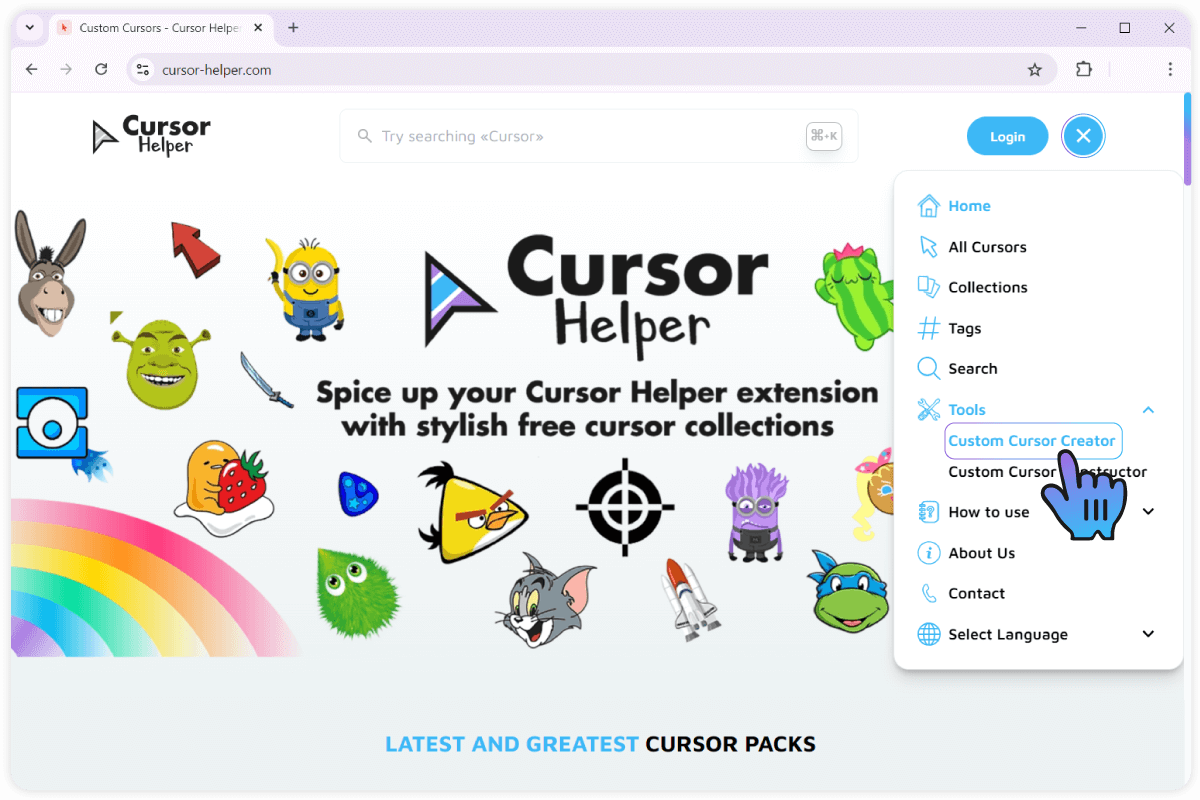
1.Go to the page with the Cursor Creator.
Navigate to the Cursor Helper website and press the “Cursor Creator” link in the upper menu. Or just follow this link to access the cursor constructor tool.
2
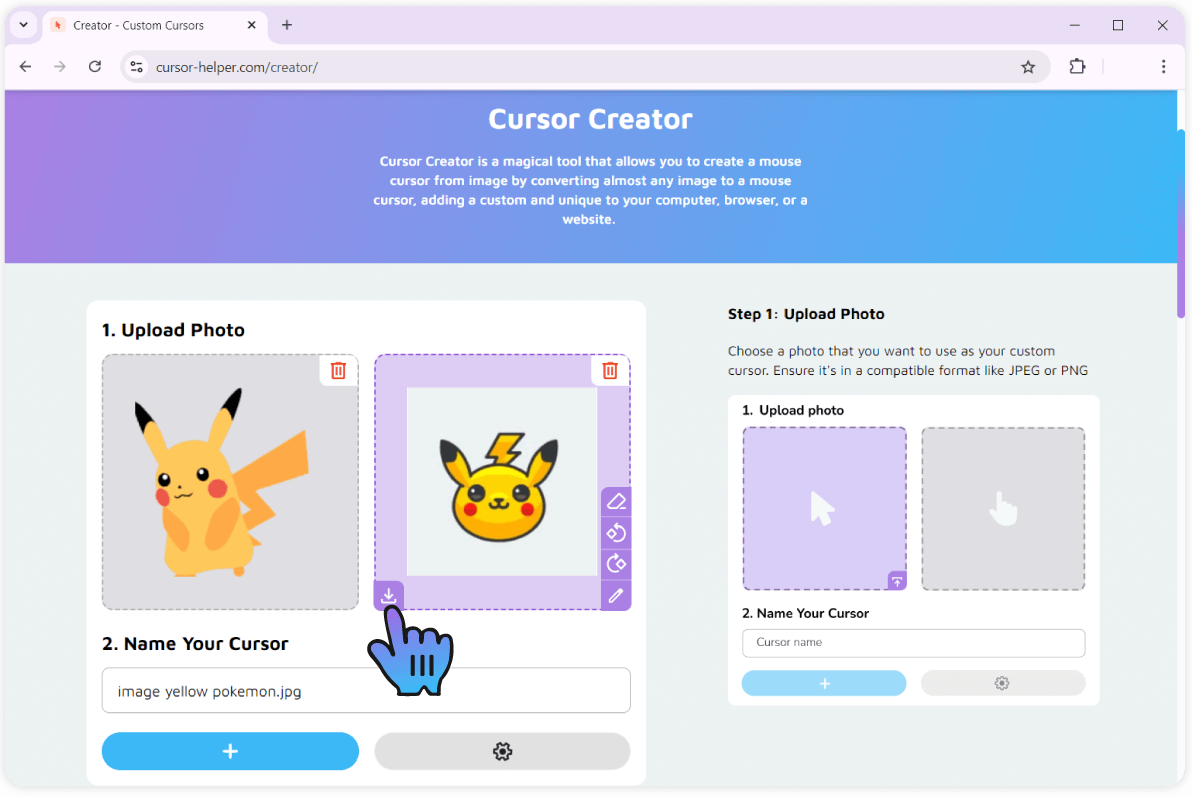
2. Upload Photo
Choose a photo that you want to use as your custom cursor. Ensure it's in a compatible format like JPEG or PNG
3
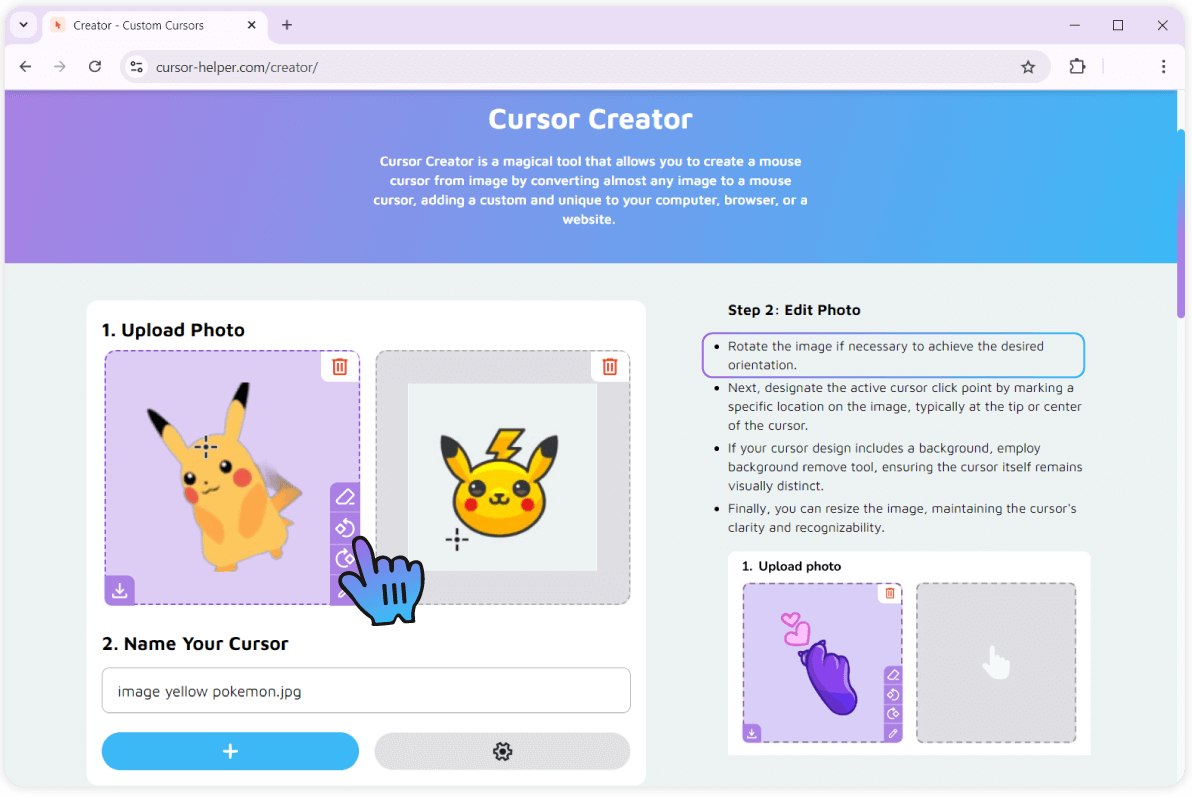
3. Edit Photo
-Rotate the image if necessary to achieve the desired orientation.
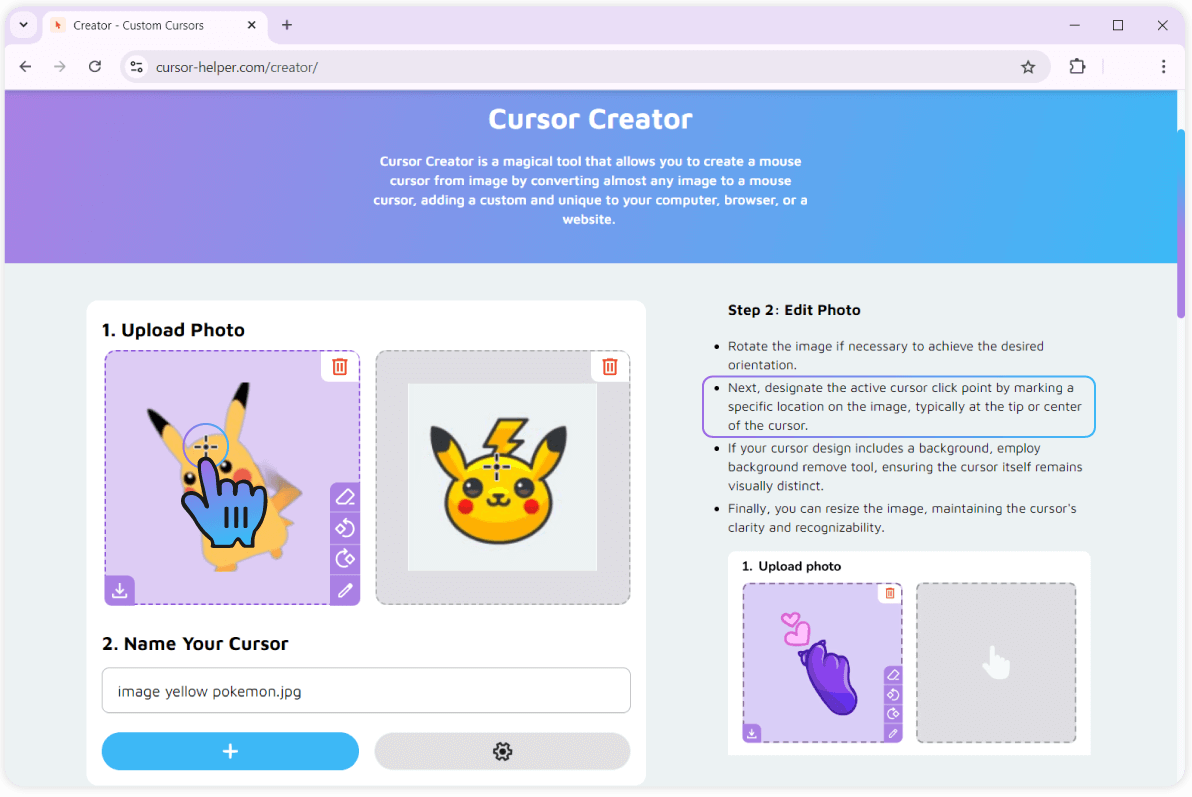
-Next, designate the active cursor click point by marking a specific location on the image, typically at the tip or center of the cursor.
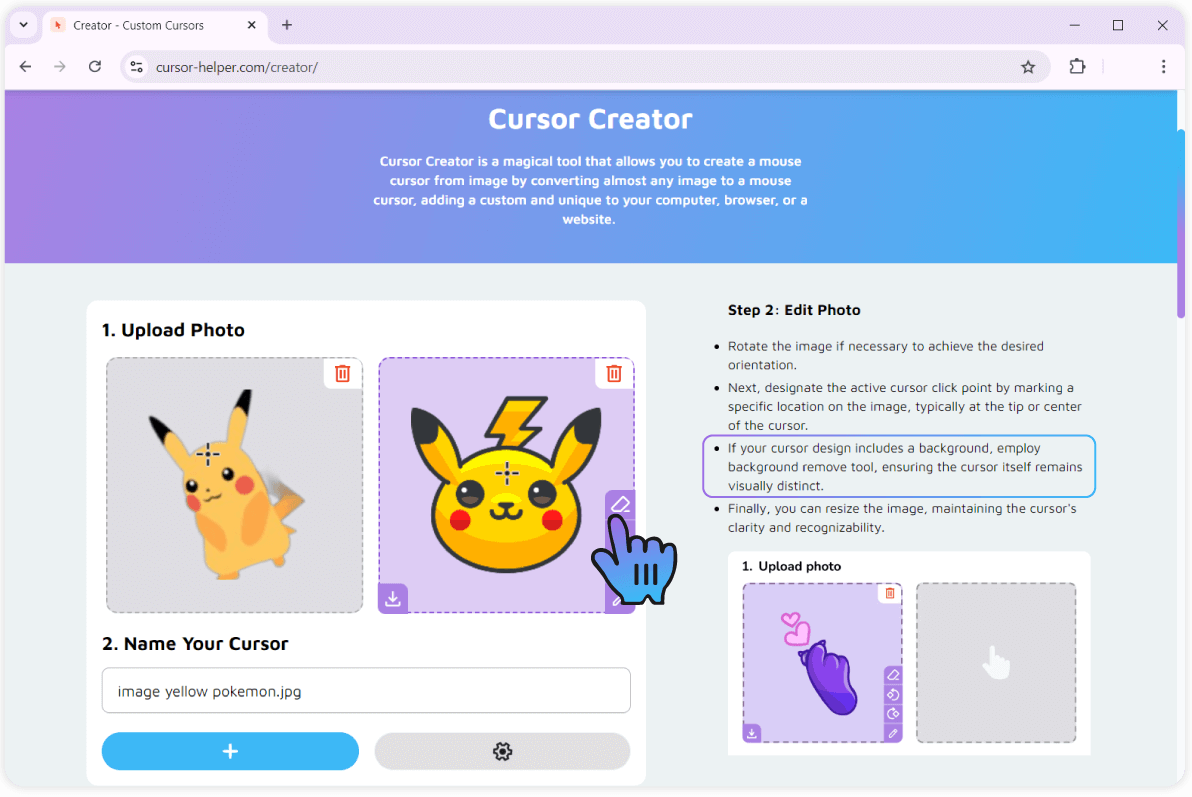
-If your cursor design includes a background, employ background remove tool, ensuring the cursor itself remains visually distinct.
-Finally, you can resize the image, maintaining the cursor's clarity and recognizability.
4
4.Name & Set up
Click the 'Set' button to apply the new cursor immediately, or the 'Add' button to save the cursor in My Collection in your Cursor Helper app or a browser extension